Day 2 Operations: Connectivity & Scaling
Mastering Public IPs, Azure DNS, Managed Disks, and VM Resizing
1. Establishing Permanent Connectivity
Before scaling my resources, I need to ensure that my users can always find my application. By default, Azure Public IPs can be dynamic, which is a risk for production.
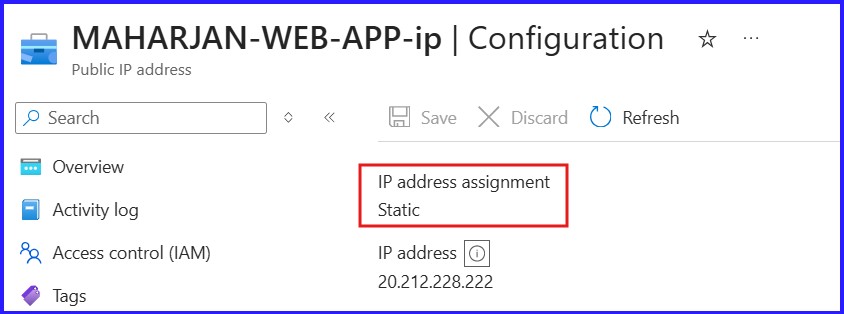
Transitioning to Static Public IP
I always switch my MAHARJAN-WEB-APP Public IP from 'Dynamic' to 'Static'. This ensures that even if I stop the VM or resize it, the IP address remains the same, preventing any DNS breaks.
Mapping the Domain with Azure DNS
With a Static IP in place, I use Azure DNS to map my domain name. I create a DNS Zone and point my registrar's name servers to Azure. Then, I configure the following records:
| Record Type | Name | Value / Target | Reason |
|---|---|---|---|
| A Record | @ (Root) | Static Public IP | Maps domain to the VM |
| CNAME | www | maharjan-tech.com | Alias for web traffic |
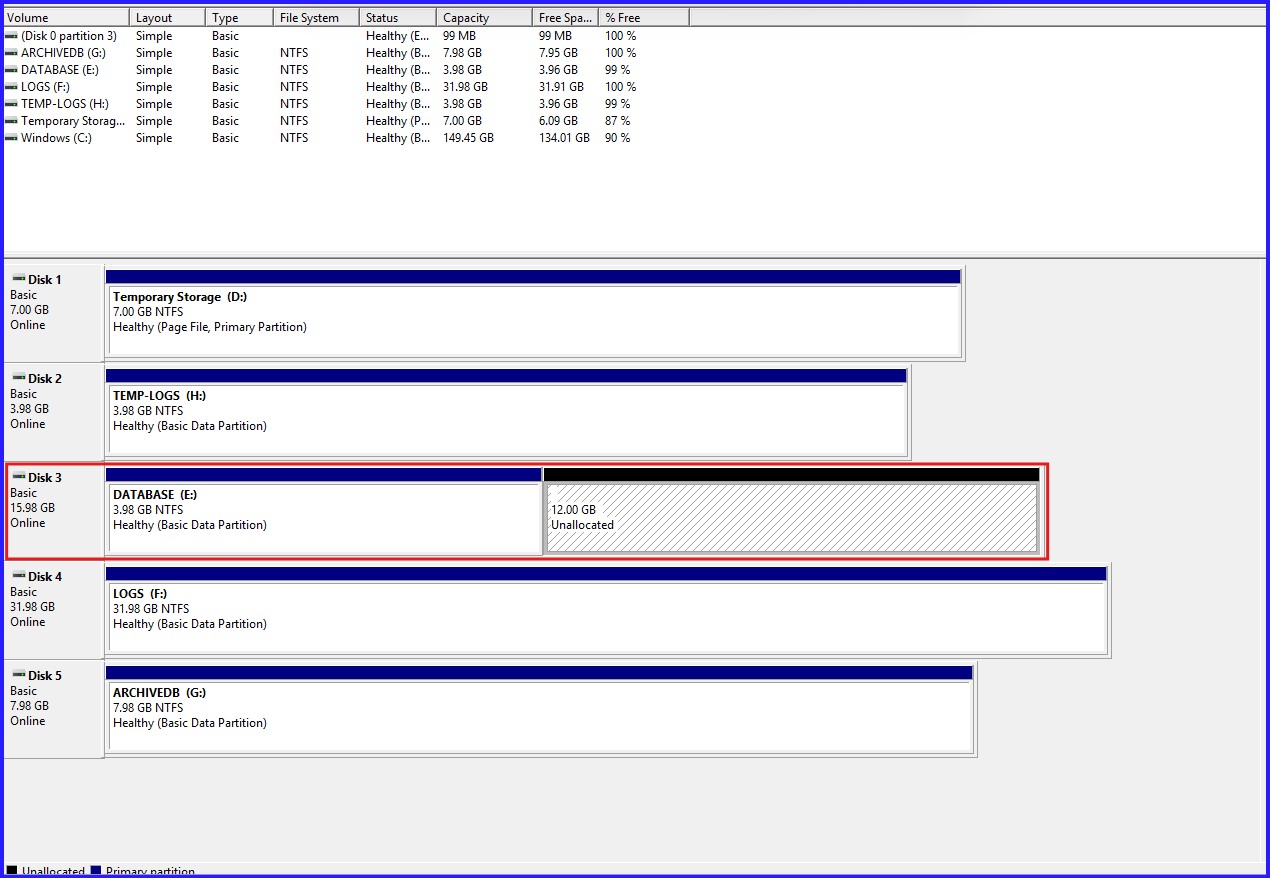
2. Managed Disk Management of OS Disk (Scaling Storage)
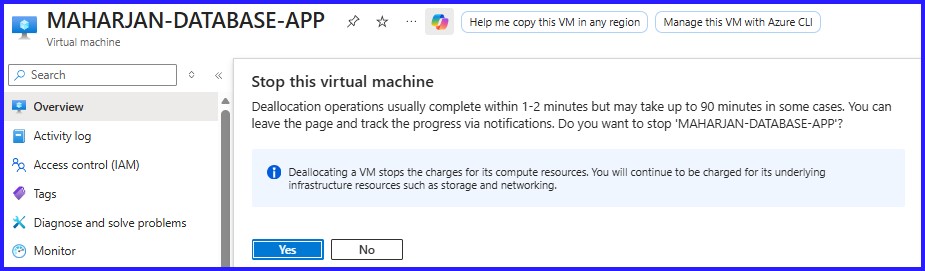
When storage hits its limit, I follow a strict three-phase process to expand my disks without losing data.
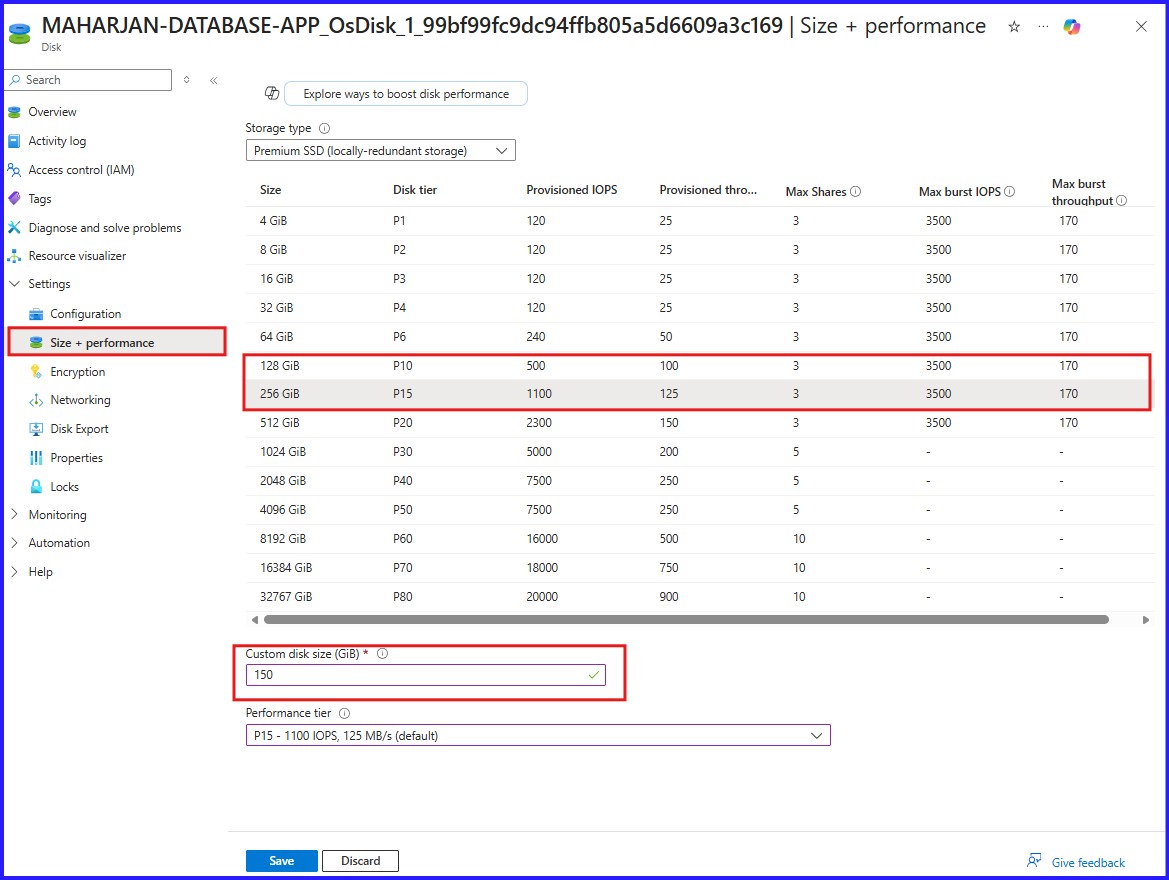
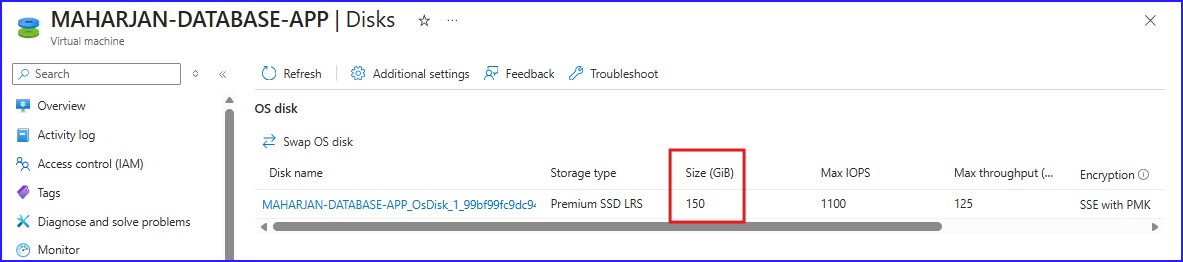
Azure Portal Resize
I start by Deallocating the VM. Then, under Disks > Size + Performance, I increase the GiB capacity. Azure expands the physical container, but we aren't done yet!
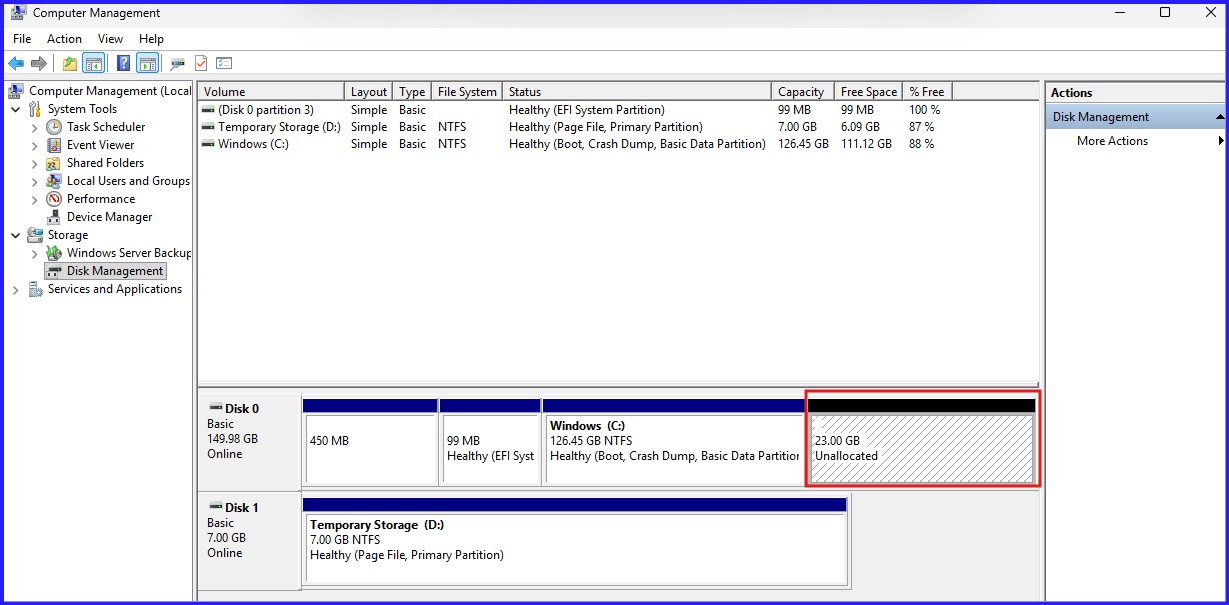
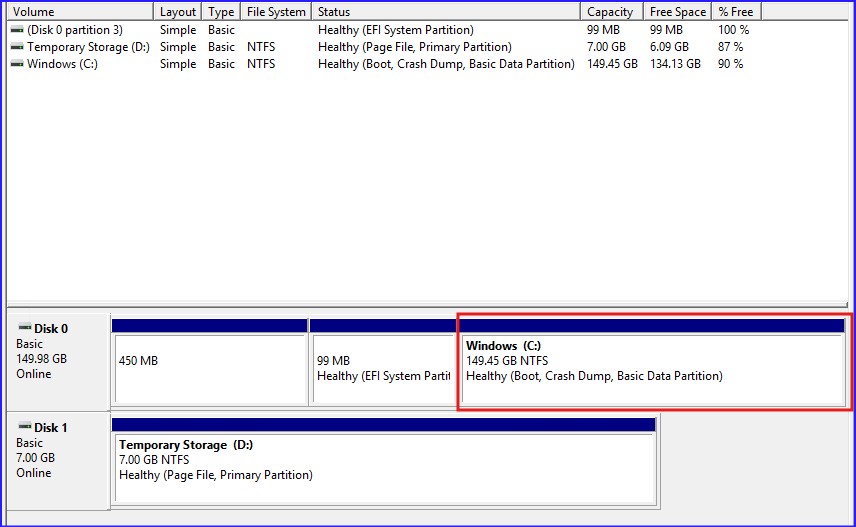
OS-Level Volume Extension
After restarting, I log into the VM. In Windows Disk Management, the new space appears as 'Unallocated'. I right-click my volume and select Extend Volume to claim that space.
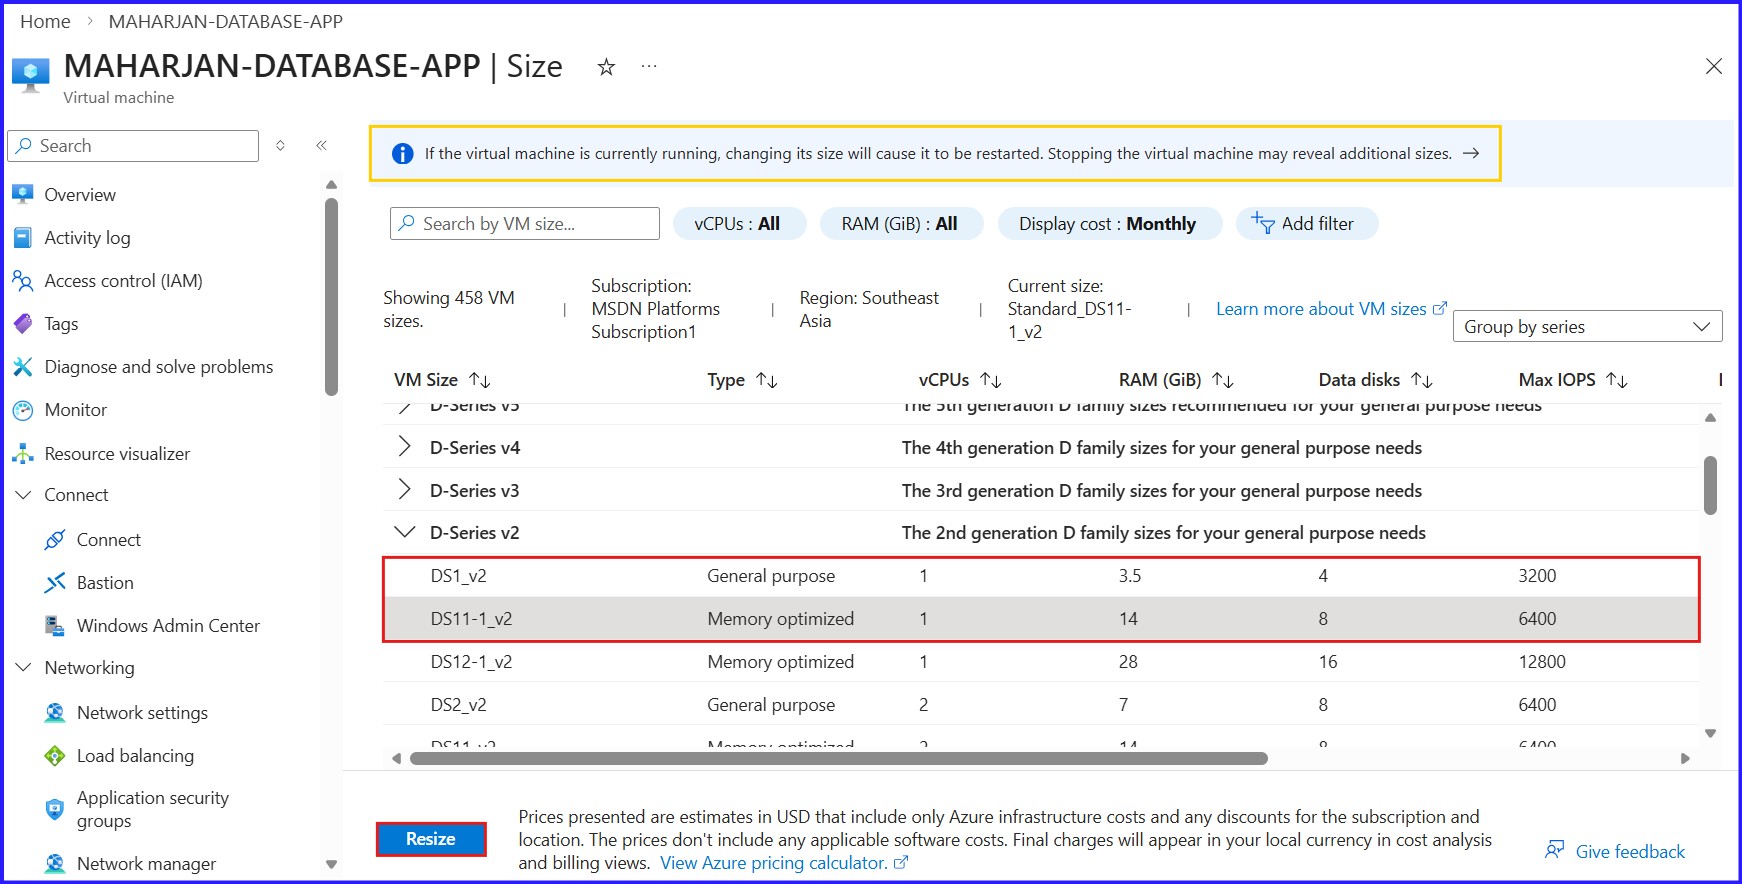
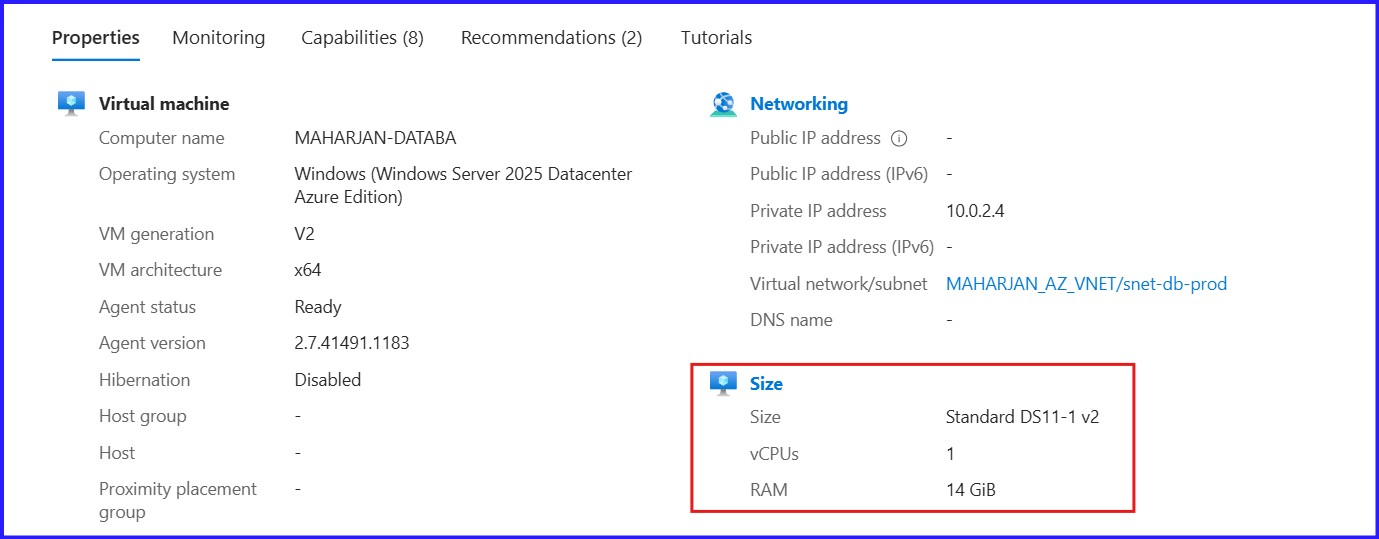
3. VM Resizing (Vertical Scaling)
Sometimes CPU or RAM is the bottleneck. When my performance metrics show high usage, I perform a VM Resize.
Choosing a New Tier
I move from a general-purpose DS1_v2 to a memory optimized DS11_v2. This gives me much more consistent throughput for production workloads.
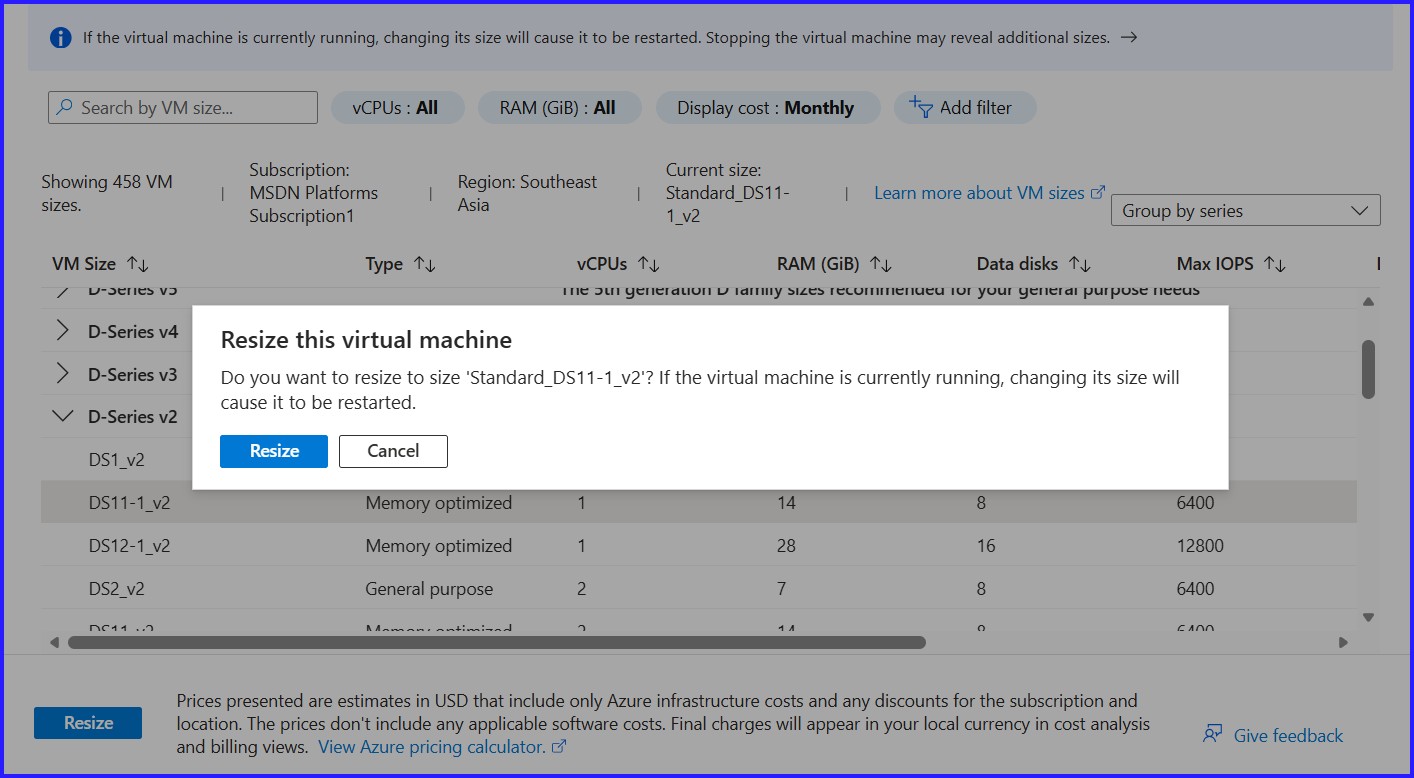
Impact Analysis
I always communicate these impacts to stakeholders before I hit 'Resize':
- Reboot Required: The VM will restart during the migration to new hardware.
- Temporary Disk: Data on the local D: drive is wiped during a resize.
- Static IP Benefit: Because we set the IP to Static in Section 1, our DNS mapping won't break during this reboot!
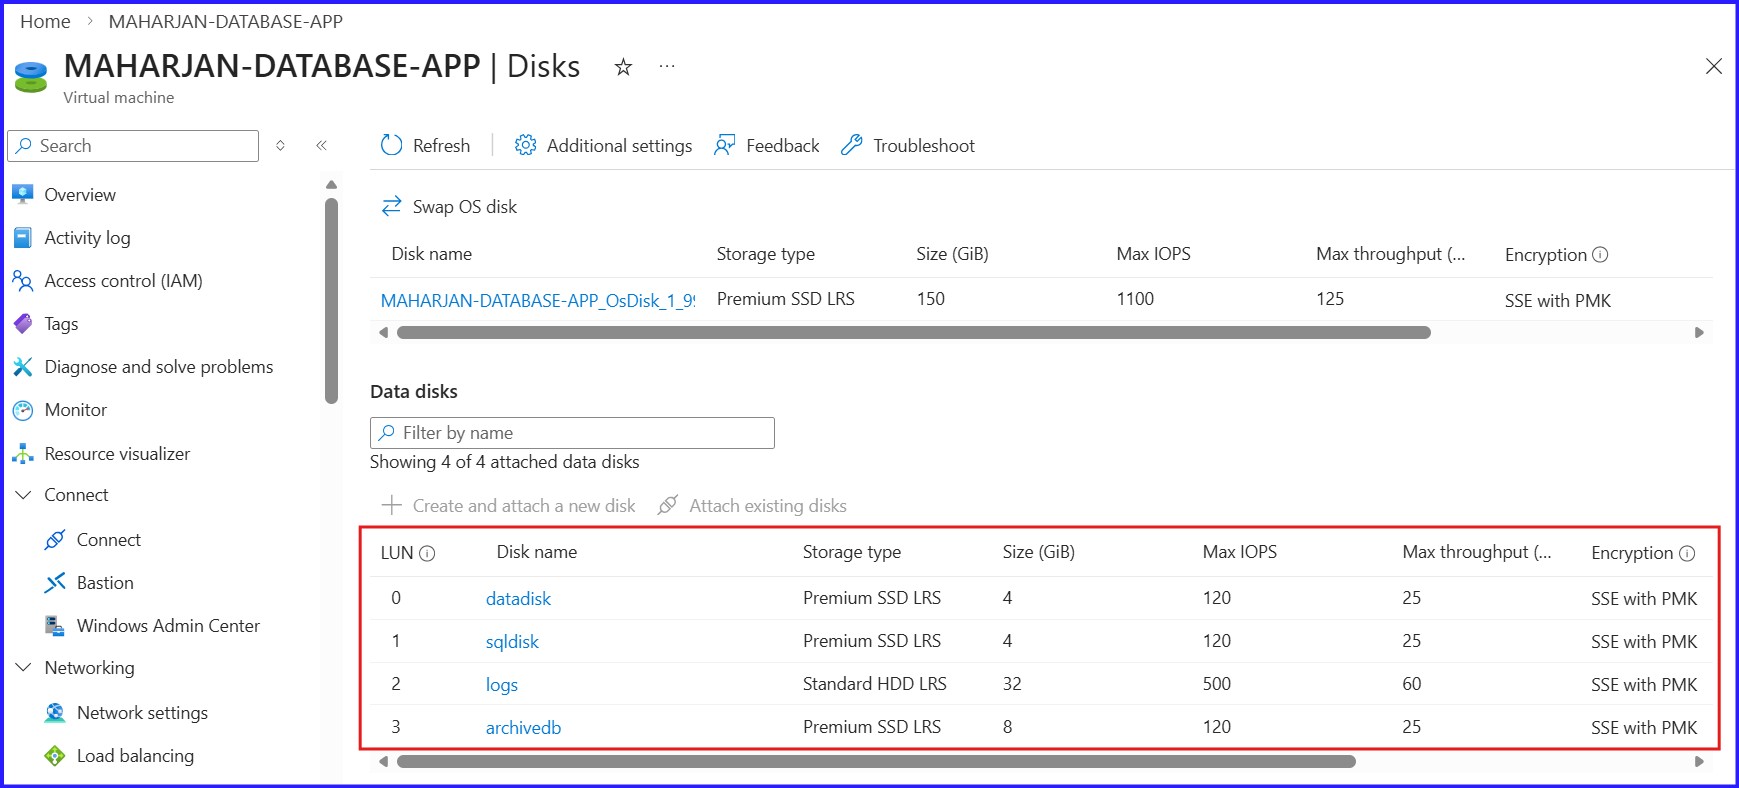
4. Upgrade Disk Size
When storage gets full and requires an increase in disk size, especially when naming conventions are missing, follow these steps:
Identify the Correct Disk
I found some organizations do not manage the Azure disk name with proper Naming Conventions, making it difficult to map with server disk partition names. To resolve this, I need to identify the correct disk via LUN Number.
1. Find the LUN in the Azure Portal
Identify which LUN is assigned to your Azure Disk: Navigate to the Azure Portal > Select VM > Settings > Disks. The LUN column shows the number (0, 1, 2, etc.) associated with each disk name.
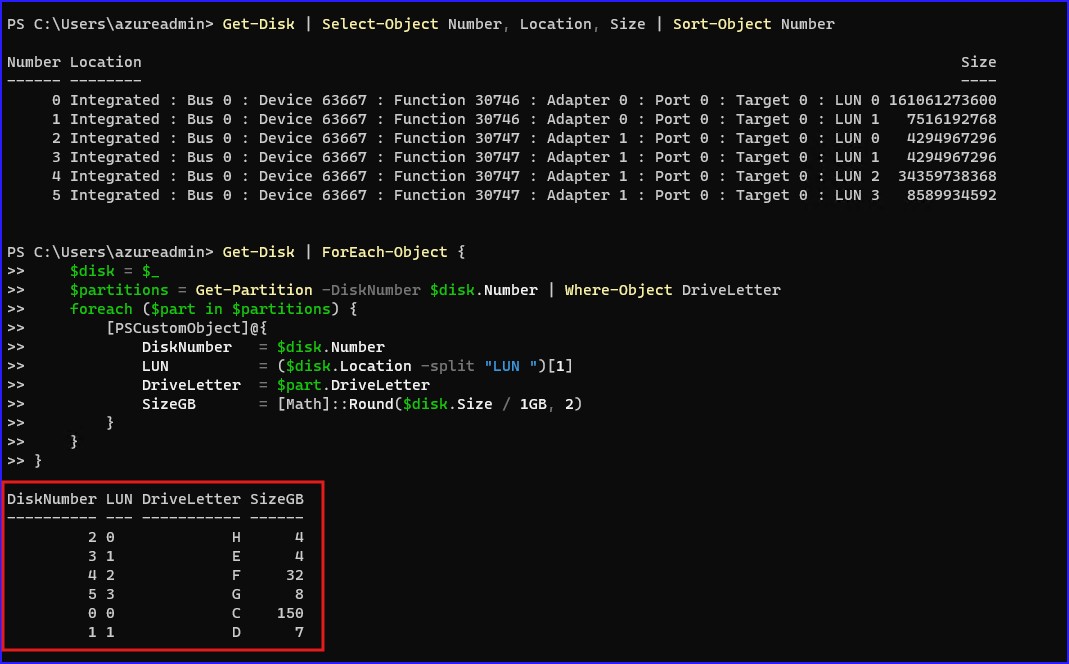
2. Map in PowerShell
Use the following commands to match the LUN from the portal to the Drive inside Windows:
# Refined mapping script:
Get-Disk | ForEach-Object {
$disk = $_
$partitions = Get-Partition -DiskNumber $disk.Number | Where-Object DriveLetter
foreach ($part in $partitions) {
[PSCustomObject]@{
DiskNumber = $disk.Number
LUN = ($disk.Location -split "LUN ")[1]
DriveLetter = $part.DriveLetter
SizeGB = [Math]::Round($disk.Size / 1GB, 2)
}
}
}
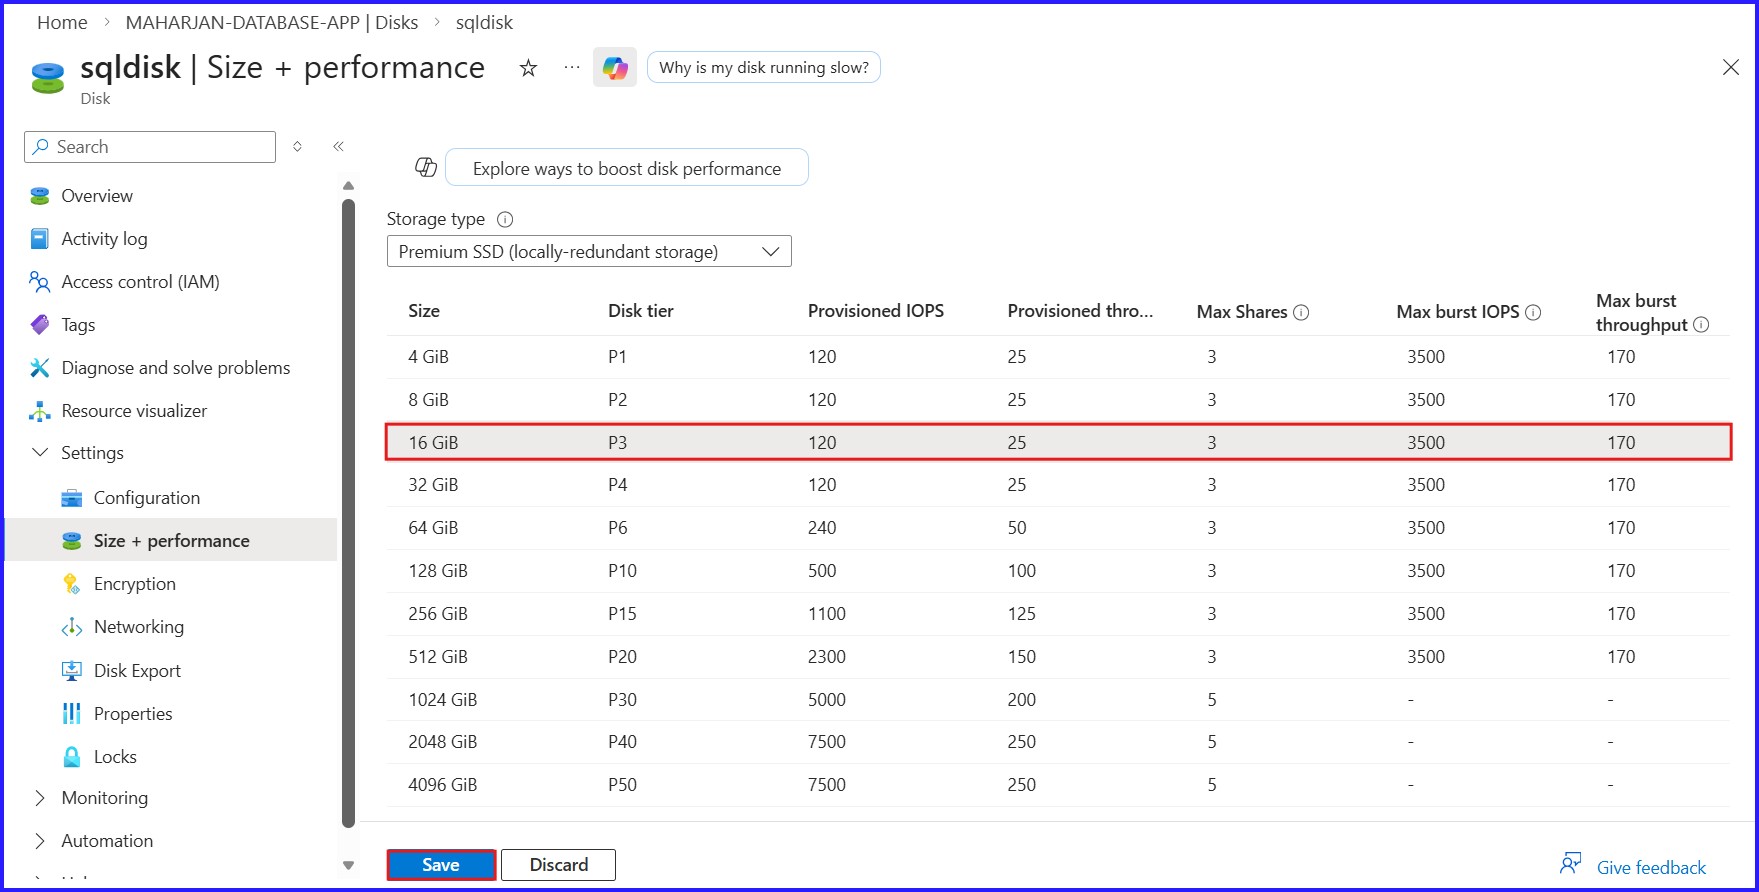
Disk Upgrade
From the Azure portal, increase the disk size.
Conclusion & Key Takeaways
Managing Azure infrastructure requires a proactive approach to connectivity and resource management. Here are the core pillars to remember:
- Connectivity First: Always set a Static IP before mapping DNS to ensure permanent access during maintenance.
- The Two-Step Disk Rule: Always resize in the Azure Portal first, then log in to the Guest OS to extend the volume.
- LUN is the Source of Truth: When disk names are confusing, the LUN ID is the only reliable way to map Azure Disks to Windows Drive Letters.
- Snapshots Save Careers: Never perform disk or VM modifications without a fresh recovery point (Snapshot).
- Strategic Planning: Be mindful that resizing requires a reboot and that disk expansions are irreversible—always double-check your sizes!