
Mastering the Foundation: Step-by-Step Active Directory Setup
In the modern IT landscape, Active Directory Domain Services (AD DS) remains the definitive backbone of enterprise identity management. Beyond just a directory, AD DS is the engine that facilitates secure access, centralized control, and organizational scalability.
A poorly configured Domain Controller can lead to persistent DNS issues, replication failures, and security vulnerabilities. This guide provides a detailed walkthrough for installing and configuring AD DS, ensuring your environment is built on a rock-solid foundation.
The Goal
By the end of this post, you will have a fully functional Domain Controller (DC) that handles:
- Centralized Authentication: Managing users, computers, and groups in one database.
- DNS Resolution: Vital for service location and internal networking.
- Group Policy Management: For enforcing security standards across your environment.
Prerequisites: The Golden Rules
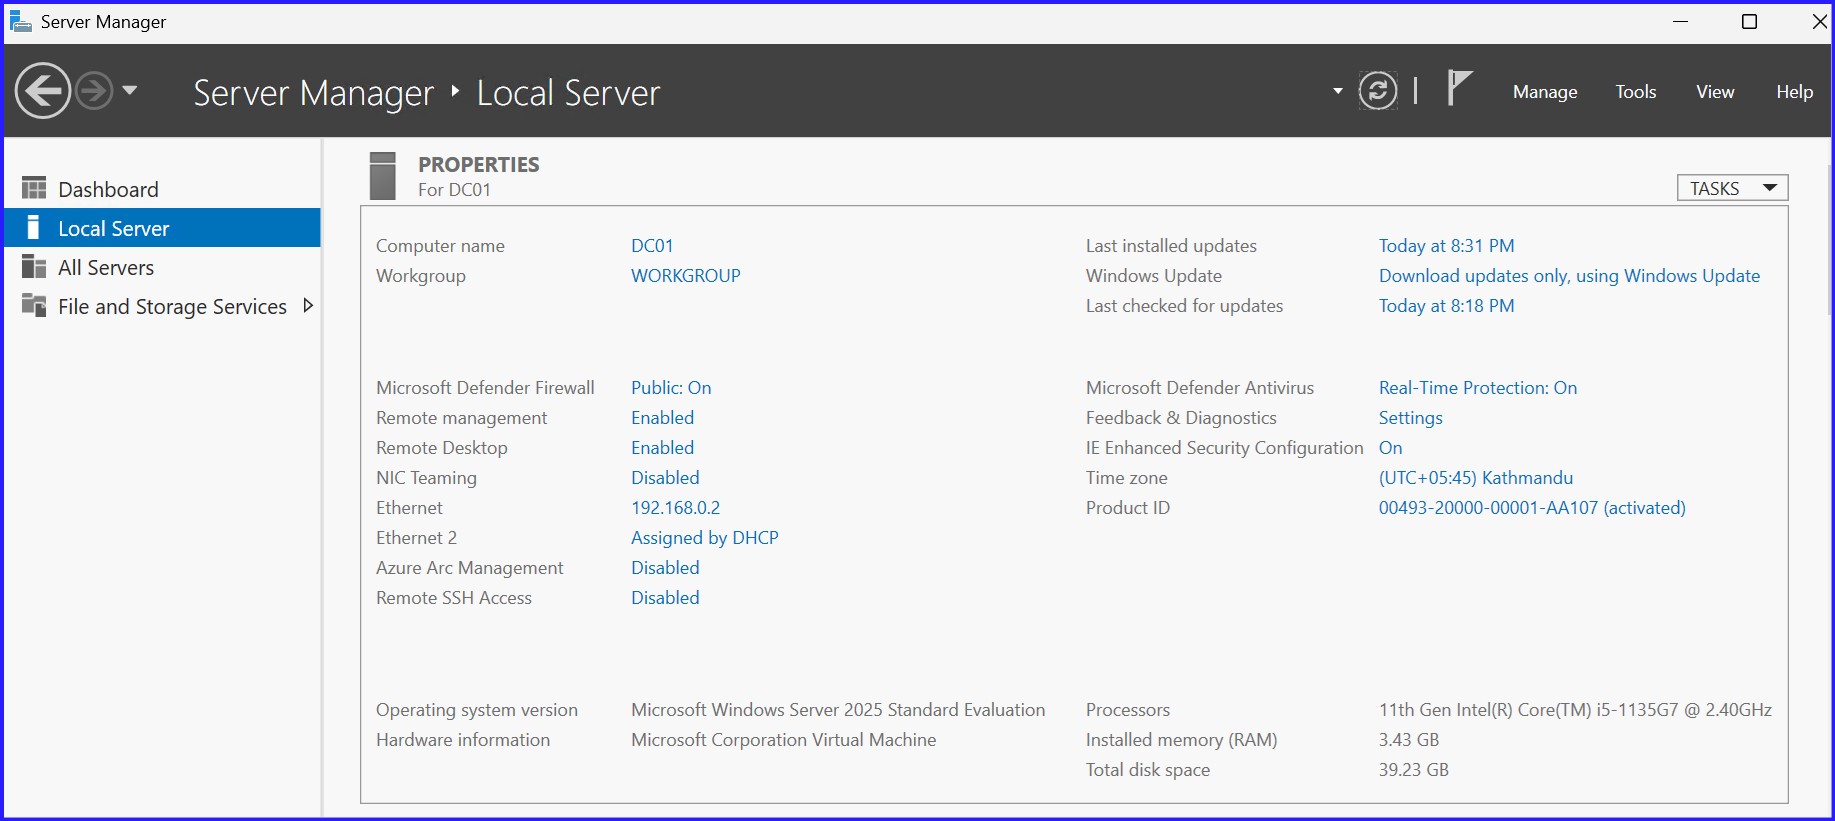
Skipping these "Day Zero" tasks is the leading cause of promotion failures. Before the installation, verify your server's local configuration.
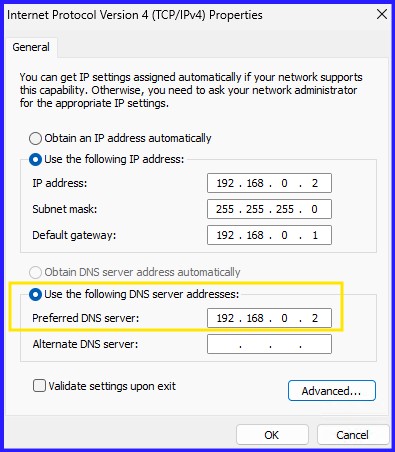
DCs must never have dynamic IPs. Set a static IPv4 and set the Preferred DNS to 127.0.0.1 (Loopback).
The local admin becomes the Domain Admin. Use at least 12-15 characters with symbols and numbers.
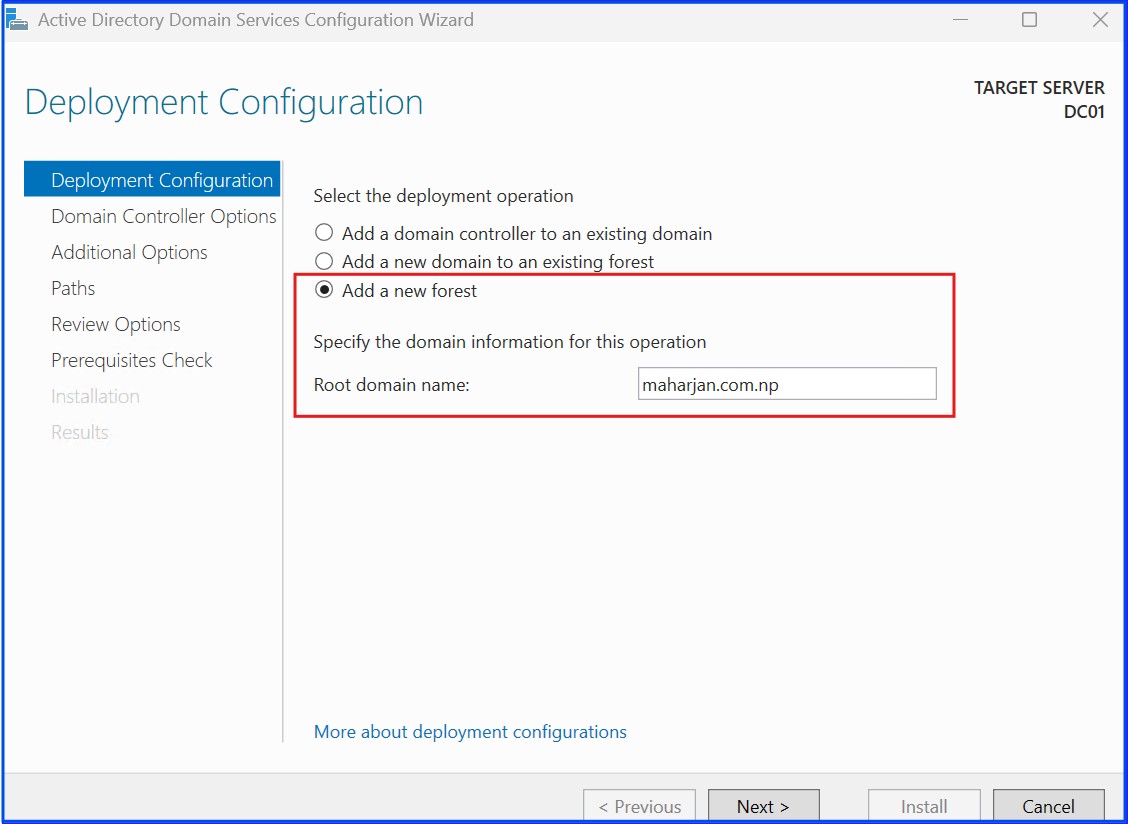
Avoid .local. Use a sub-domain of a domain you own, such as maharjan.com.np.
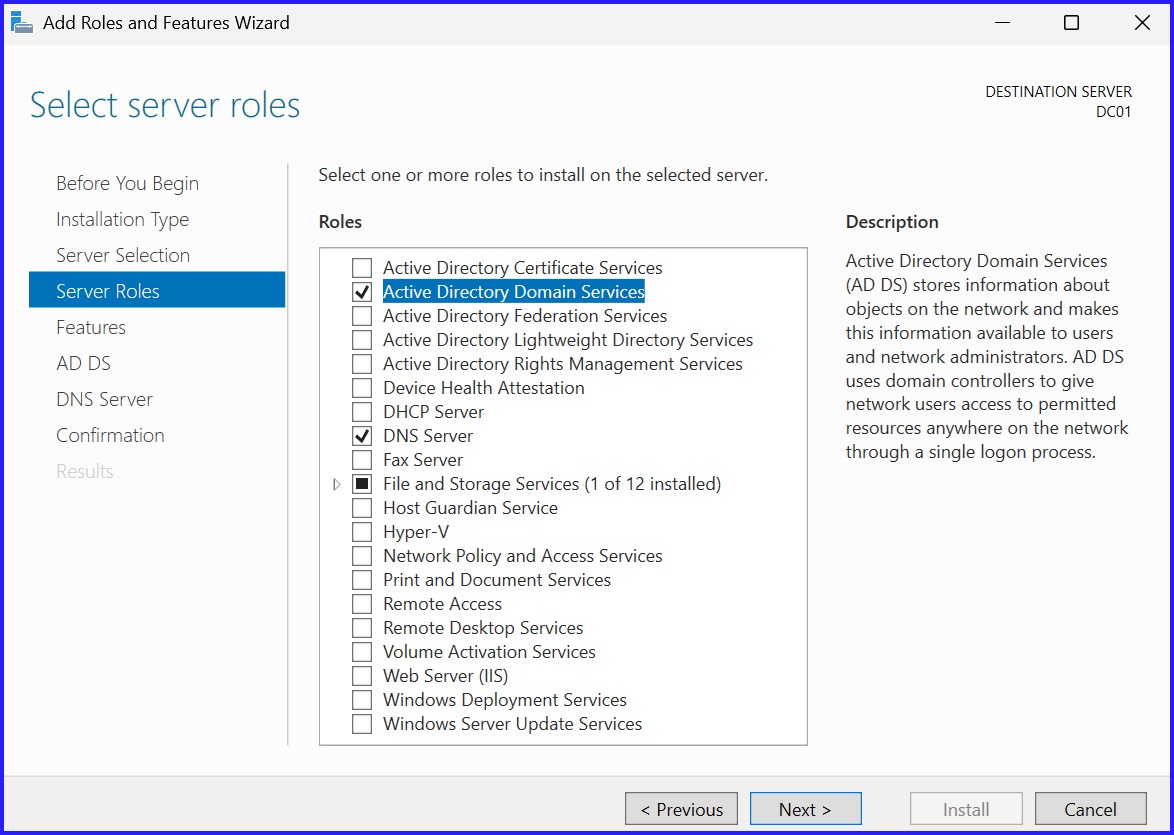
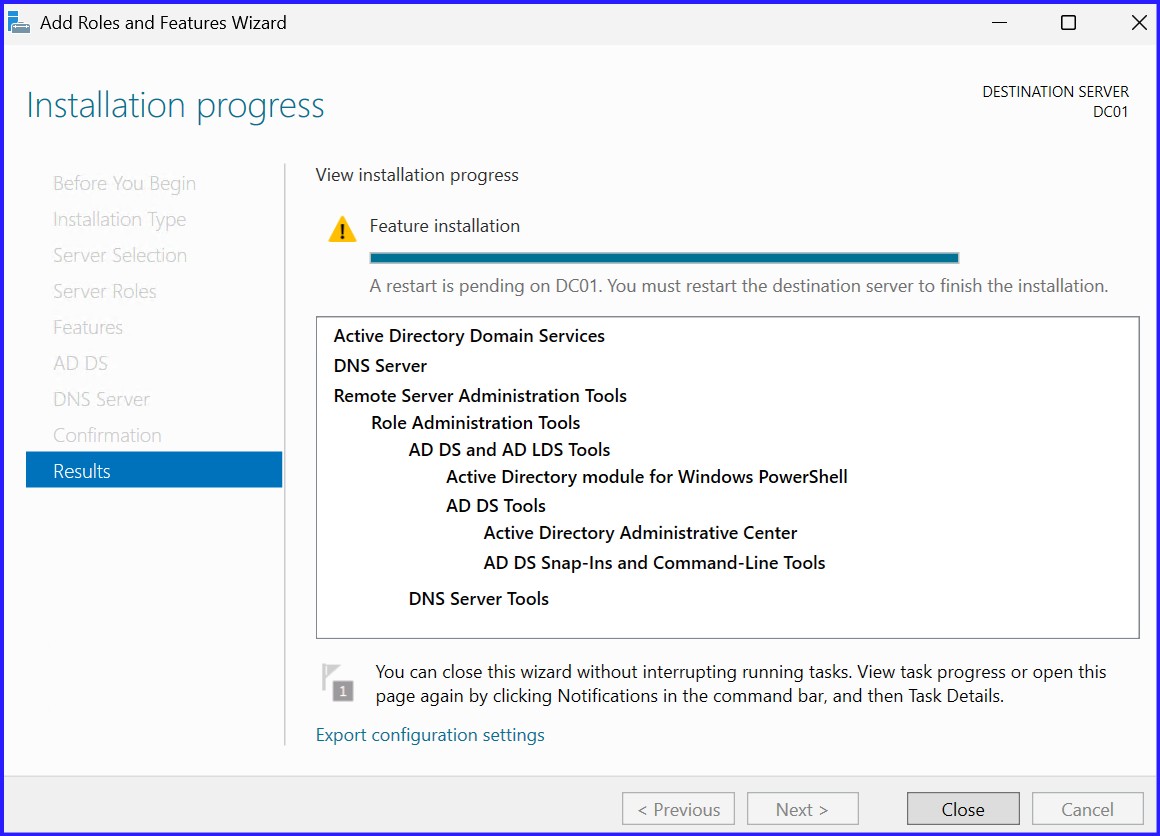
Step 1: Install AD DS Roles
Open Server Manager > Add roles and features. Select Role-based or feature-based installation and check Active Directory Domain Services. Confirm adding features and install.
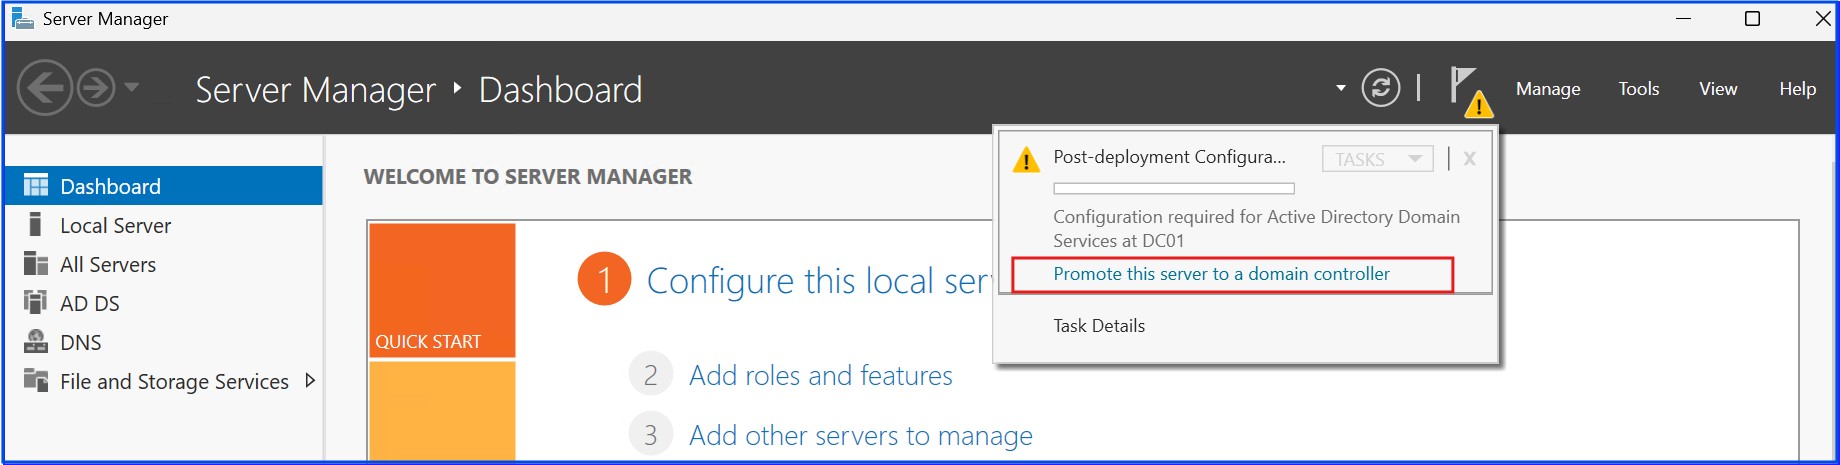
Step 2: Promote to Domain Controller
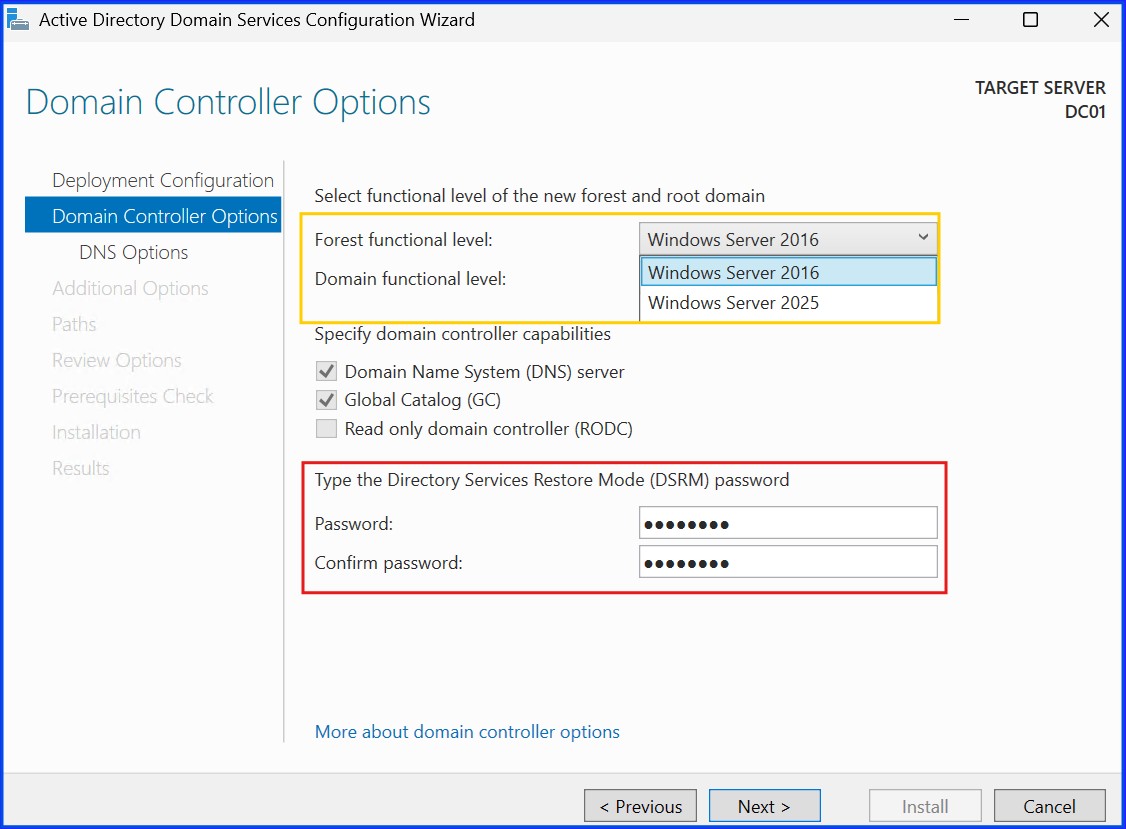
Click the Notifications Flag > Promote this server to a domain controller. Select Add a new forest and enter your Root Domain Name. Set your Functional Levels and enter a strong DSRM Password.
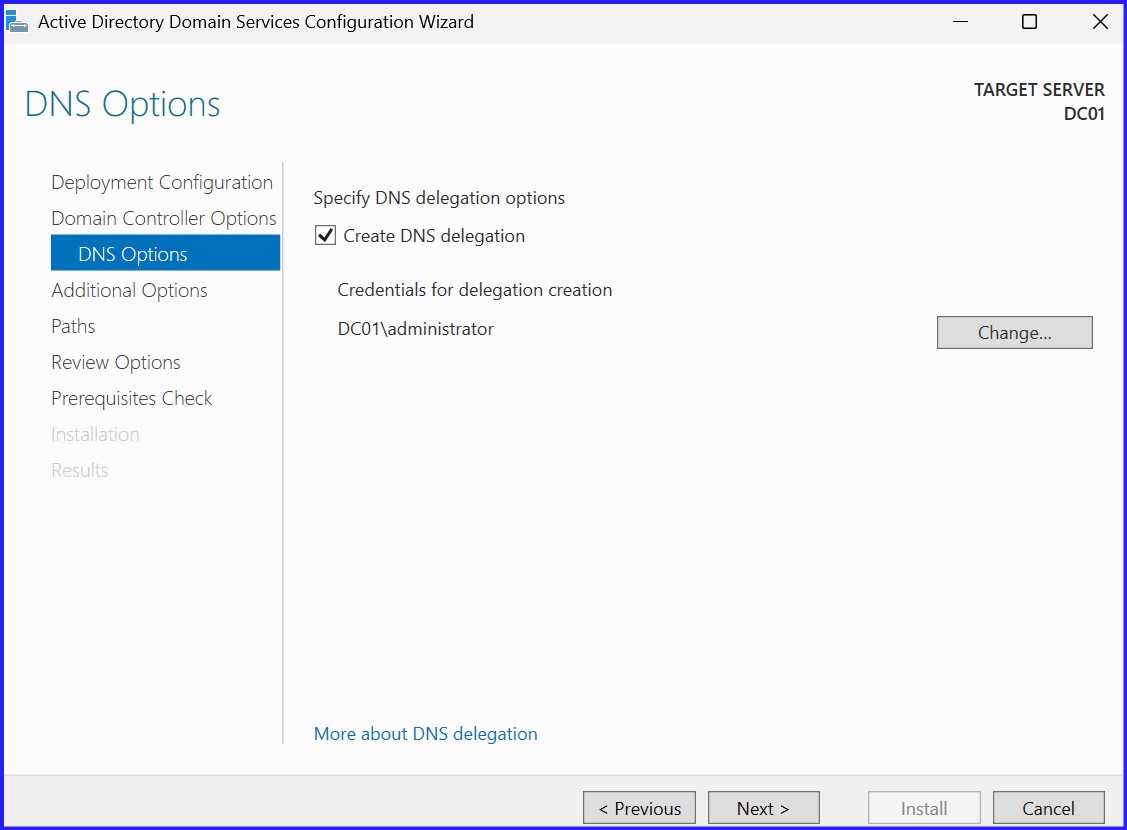
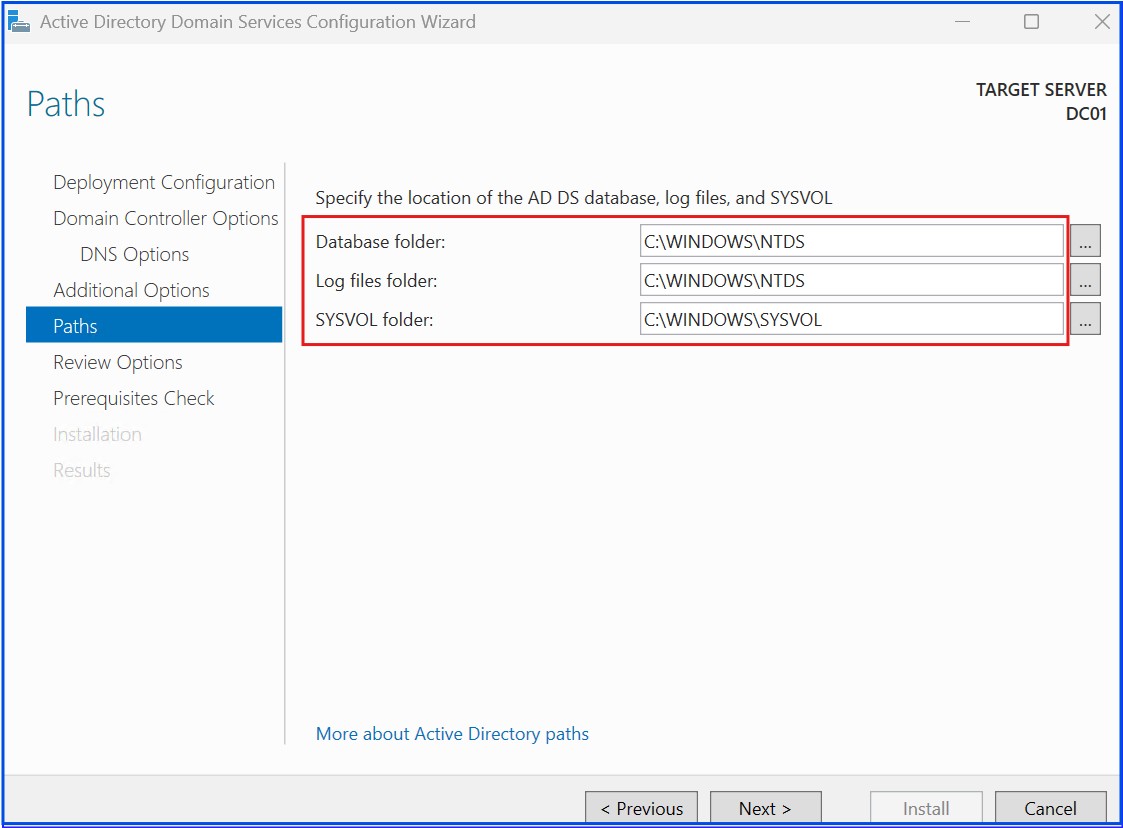
Step 3: DNS and NetBIOS Configuration
Proceed through the DNS delegation options. Verify the NetBIOS name and confirm the paths for the NTDS database, log files, and SYSVOL.
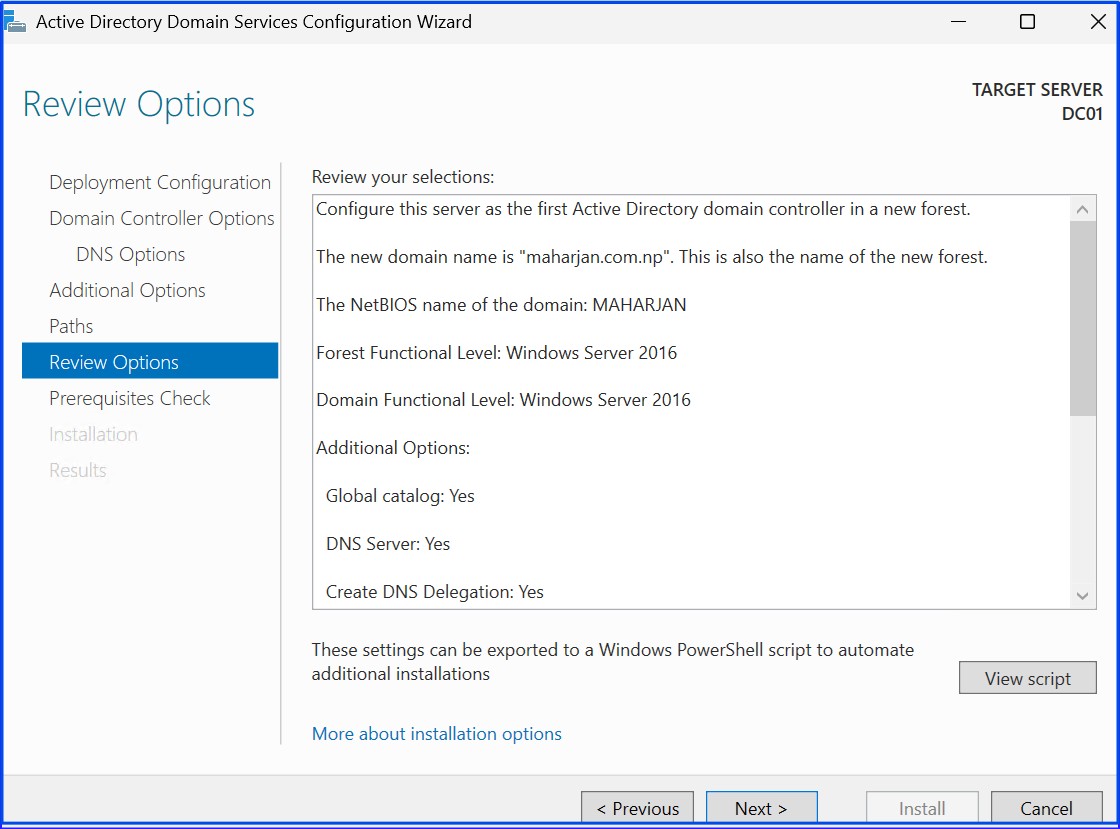
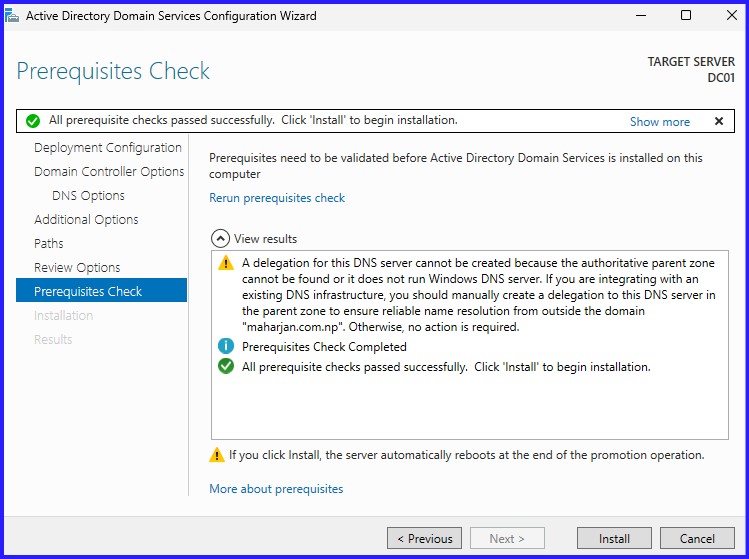
Step 4: Review and Install
Review your selections and wait for the Prerequisites Check. Ensure you receive the green "All prerequisites checks passed successfully" message before clicking Install. The server will reboot.
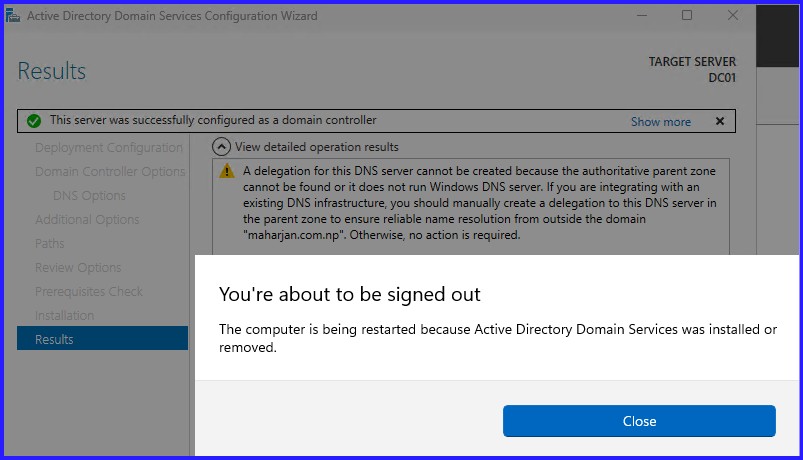
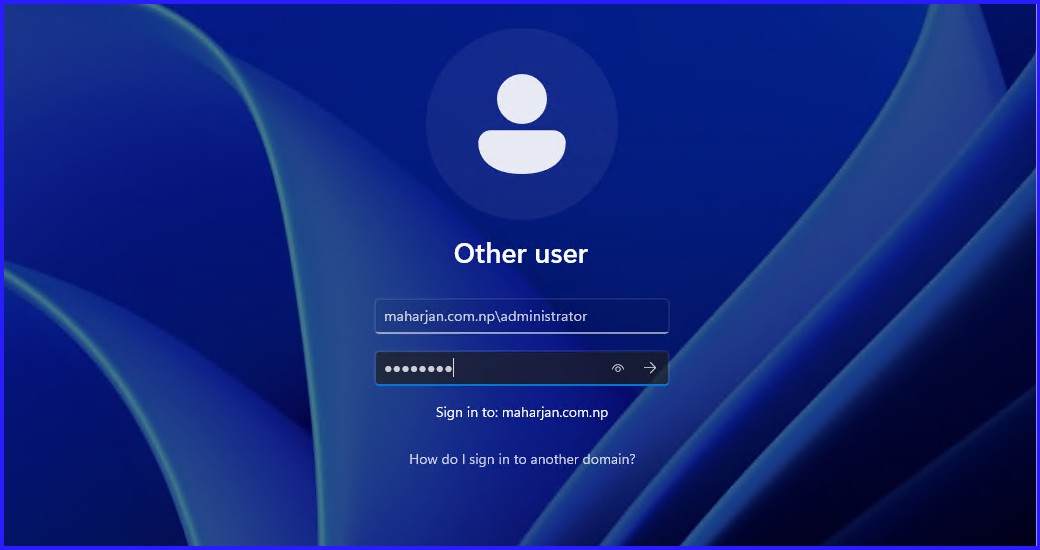
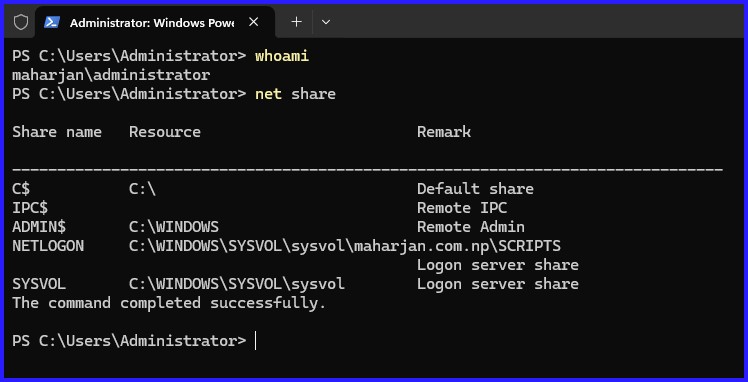
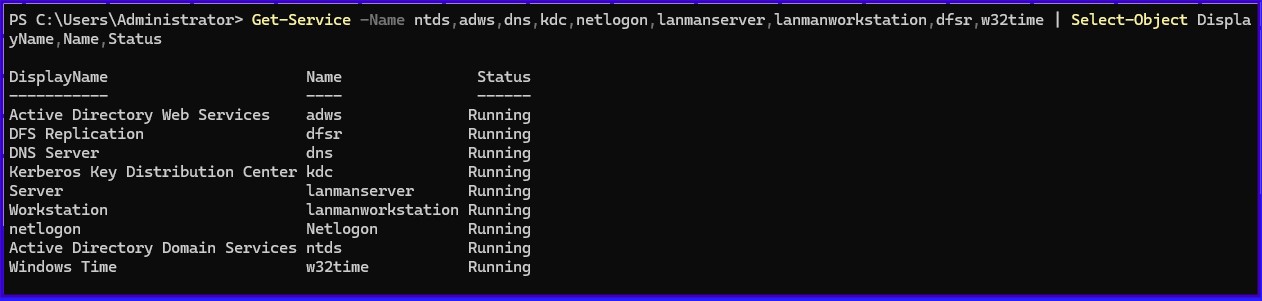
Step 5: Verify Netlogon and Sysvol Shares
Post-reboot, log in as maharjan.com.np\Administrator. You must verify that the DC is sharing the required folders for authentication and Group Policy.
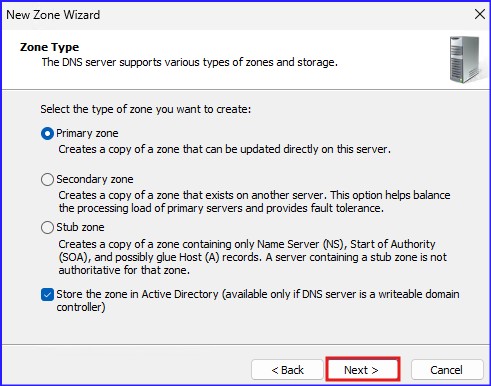
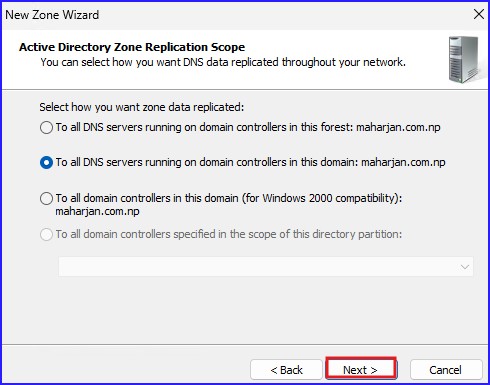
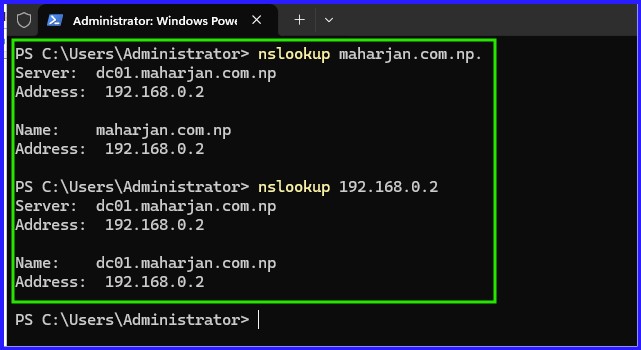
Step 6: Verify Name Server Lookup
Resolve DNS with Host and Reverse DNS Record
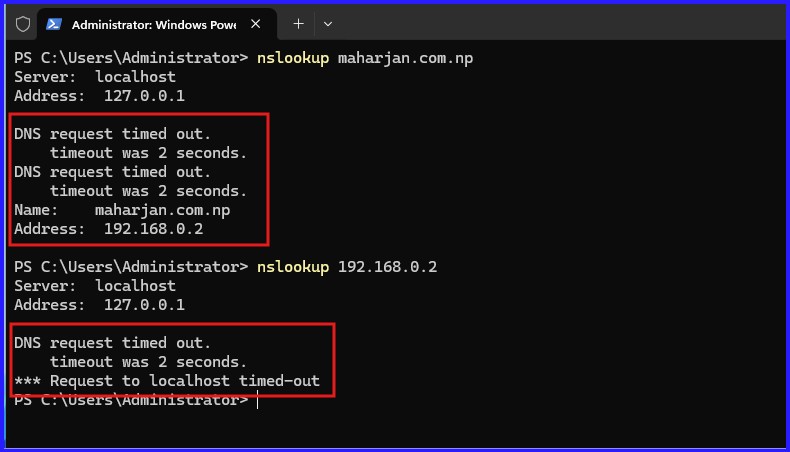
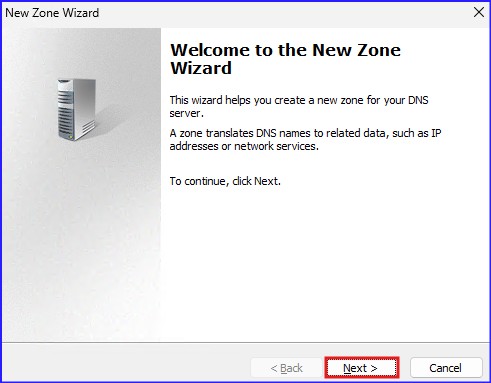
To resolve the IP Address to Host Record, Create Reverse Zone:
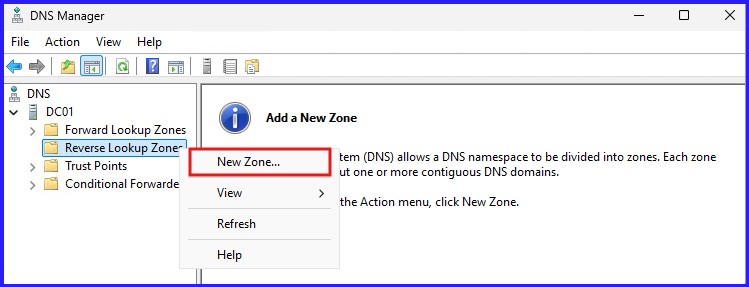
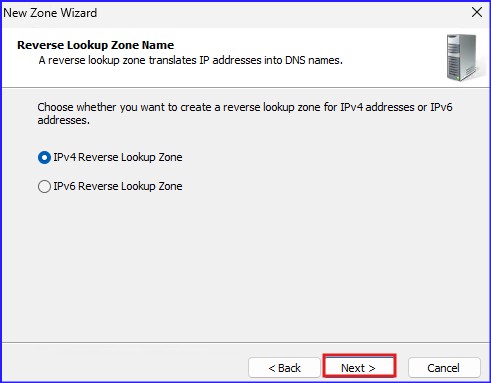
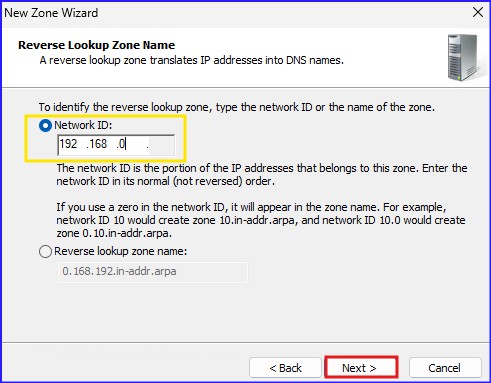
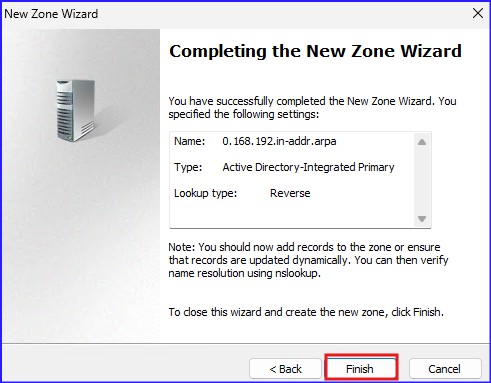
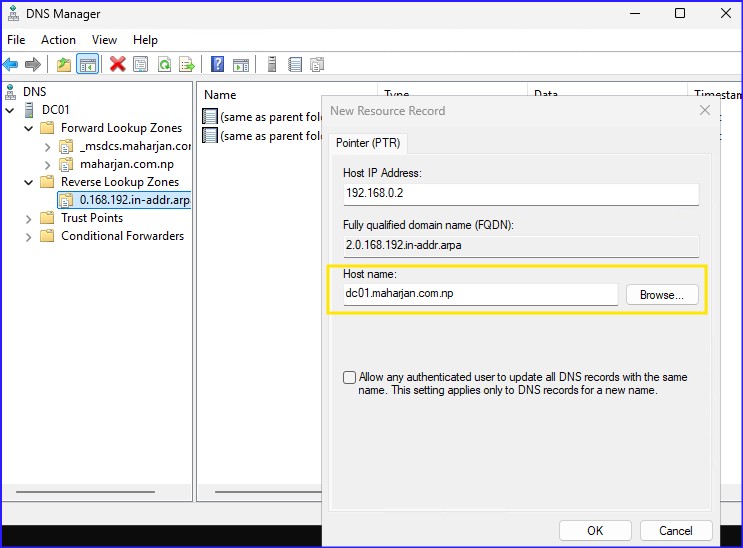
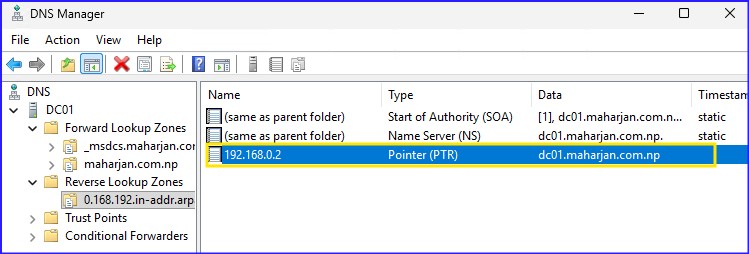
Reverse Zone Created for 192.168.0 Subnet. Pointer Record has been updated.
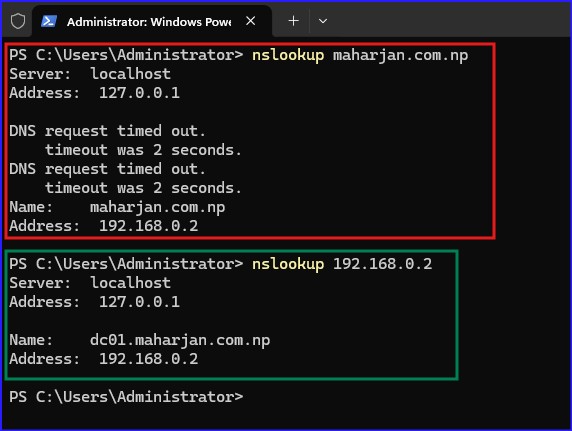
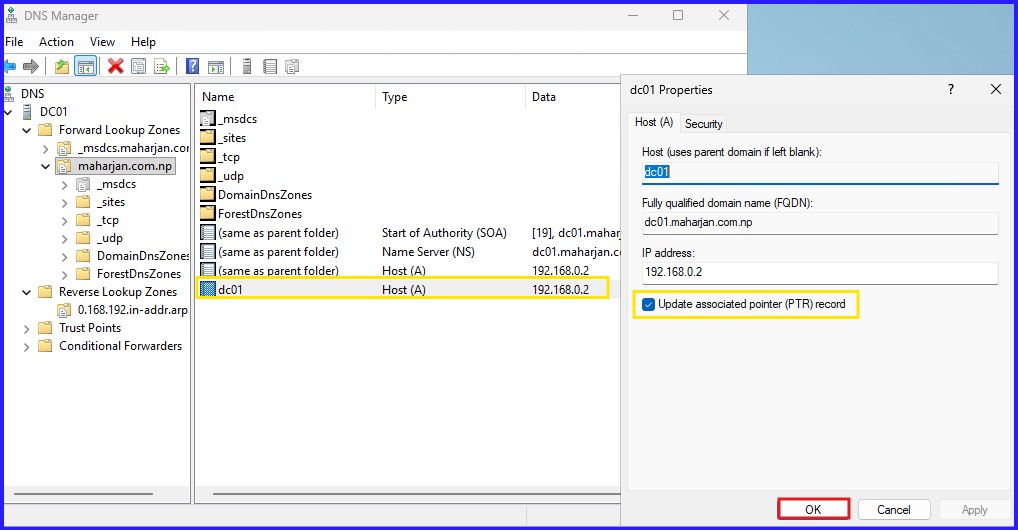
To Resolved Hostname to IP address change localhost IP 127.0.0.1 to Static DNS IP (Self)
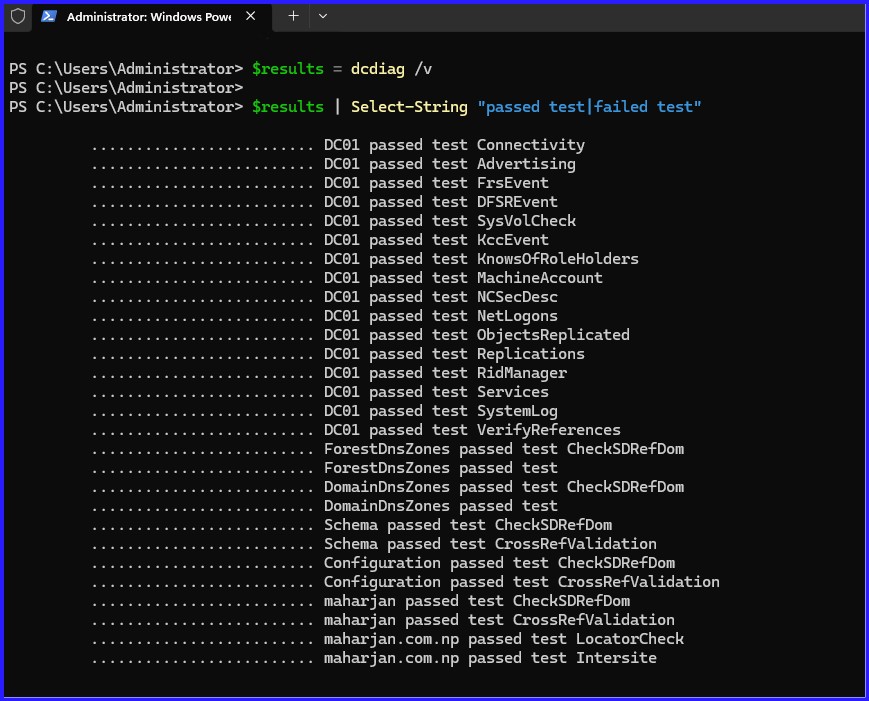
Step 7: AD Health Check & Diagnostics
Use dcdiag to verify the DNS health and service connectivity. All tests should return a "Passed" status.
"Struggling with deeper DC issues? I'm putting together a detailed breakdown of error codes and fixes over in the FAQs section to help you troubleshoot like a pro."
Conclusion
Deploying your first Domain Controller is a significant milestone in systems architecture. A successful installation provides the security and management framework required to scale your infrastructure securely. Moving forward, remember that Active Directory is a living database—regular health checks and a clean OU structure are essential to maintaining a stable environment.